Archive | Valentine’s Day

Before & Aftah Bedroom

Happy Valentines Day!

Today is all about love and I wanted to dedicate this blog post to my my wonderful clients who trust me enough and allow me to do what I truly love.

321cfb224fc52ae8d59d81ba065ba217

Source

And I also love this blog (even if I don’t update it quite as often as I would like… cue blog guilt setting in) But really, I love to write these fun little pieces and I especially love when you guys comment back when I ask for your opinions.  Remember the Million Dollar Bed Skirt blog post I shared last April?  The bedskirt was going to coordinate with this crazy 7 foot headboard we created using a fun Schumacher fabric.IMG_2876-1024x768

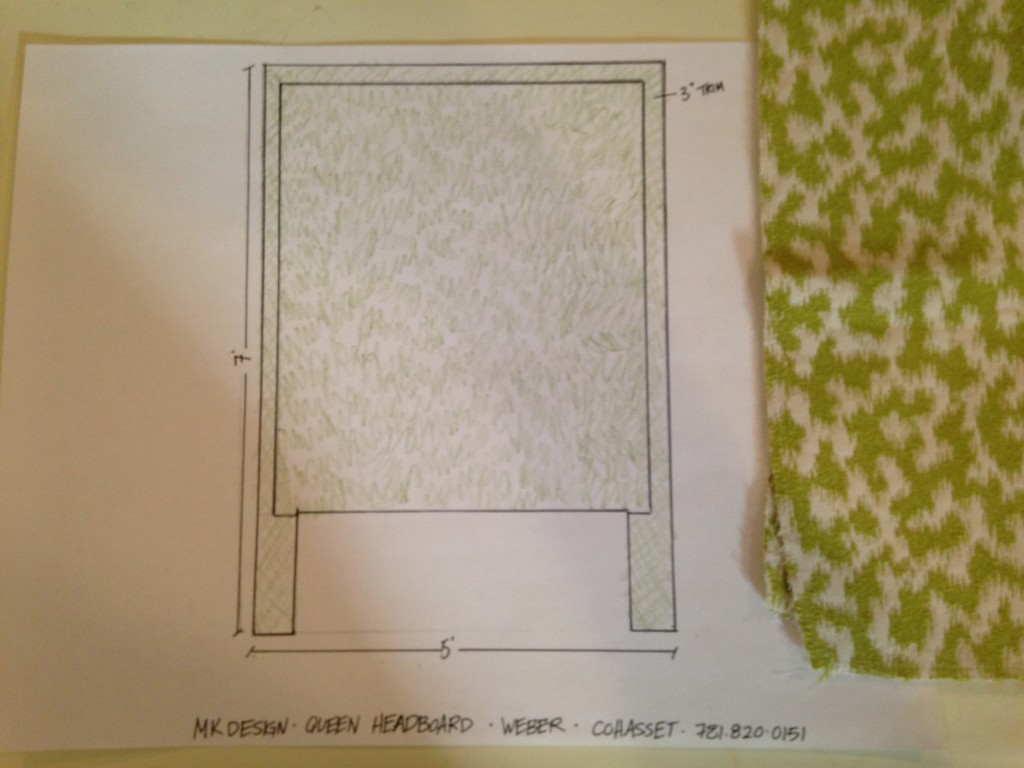
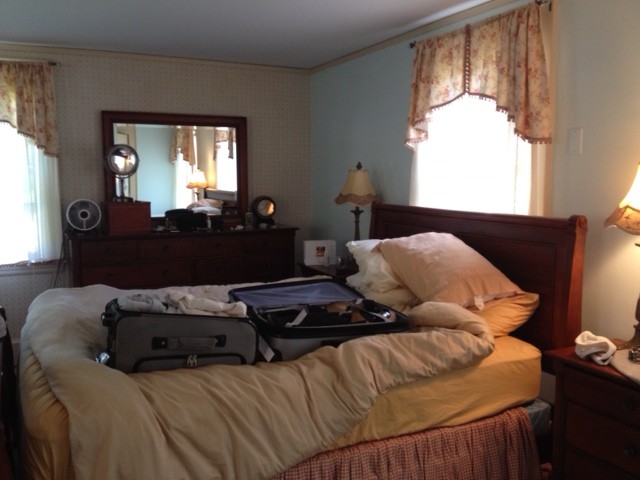
Well, although it’s been a while I can finally show you the “winner”  (Full Disclosure: the client picked the one she liked.)  So here’s the before…

image_26

And here’s the Aftah!  MDBSA #7 (Million Dollar Bed Skirt Alternative) was the winner.

Bedroom

Photo:  Michael J. Lee

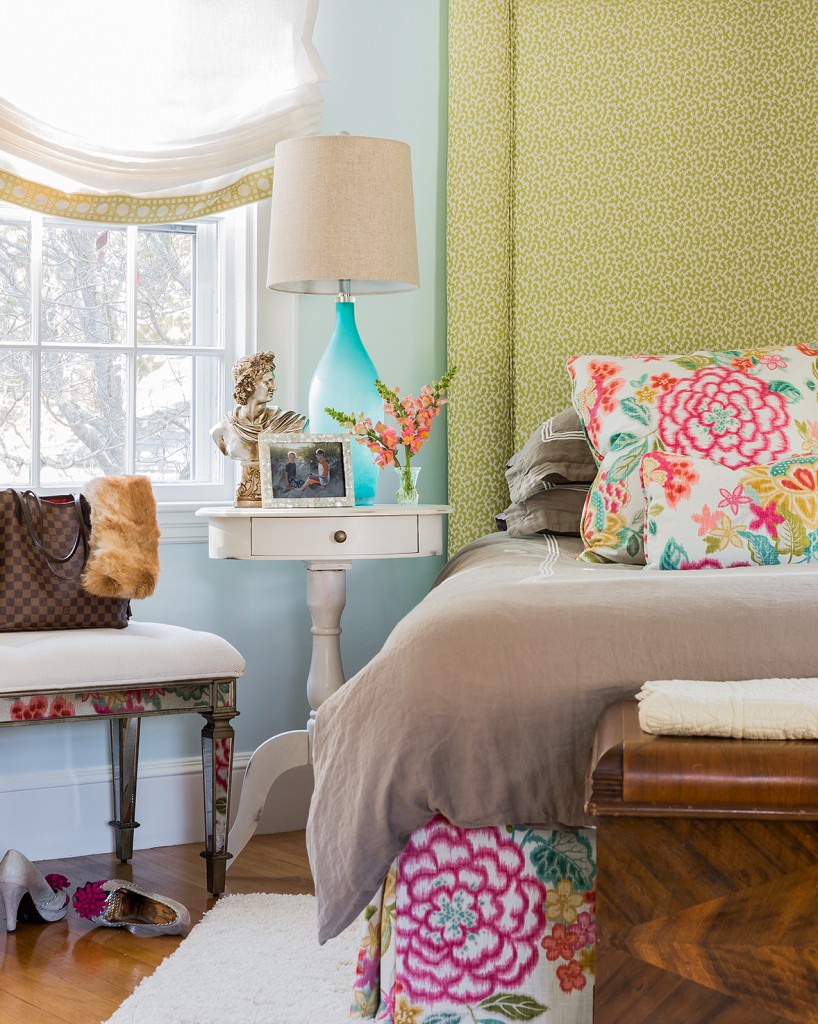
Totally fun right?!?  Grown up bedrooms don’t have to be so serious, let them be an expression of yourself.  Can you tell our client was a super fun and young at heart empty nester?  Is your bedroom a place you love to be?  If not, call me for a bedroom DoOvah!

1

Roses Are Red

A couple of years ago I was hired to decorate a Valentine’s Day Soiree.  All blog guilt aside…I’m finally publishing and sharing a peek at the night with you!  Let’s start with the walkway, all twinkly lights of course. I lined the entire path with about 40 mason jar candles dressed up for the occasion.  A dozen long stem roses on a high top in the enteryway greeted the guests when they arrived (OK who am I kiddingthe champagne on the high top REALLY greeted the guestsbut the flowers were a nice touch!)The cabinet in the foyer was draped in red fabric and decorated with a candelabra and an old photo from my clients parents wedding night.  So Romantic! In the formal living room I used crystal candle sticks and bud vases  for a simple elegant design. I dressed the windows with roses and candles as well.  In the dining room, the chairs were adorned with tulle bows, a white table cloth with a silver sequined table runner, and several dozen roses.The sideboard with covered in red burlap, framed valentine subway art, a picture of the happy couple and sprinkled with “diamonds” that glistened through the night. I actually created the runner by placing three placemats together on the length of the table.  With the “disco ball” vases…so sparkly!  Remember when I posted this mantel idea?  Well, here is the rest of the room.  I pushed back the coffee table and added cushions to create some bench seating and make room for the dance floor!  Speaking of dancing…I also brought in a few high top tables for the party goers to rest their drinks on while there were showcasing their moves.  I’ve shown you this before, but it’s still one of my favorites, add a small framed mirror to glitz up your centerpieces.  We also pushed back the couches and added a few decorative pillows.  Oh, and candles…

because you can never have too many!  Don’t worry, my fire safety patrol friends, the ones on the sofa table were flameless.  So even if it’s just a simple bouquet of hot pink roses in a black vase, I hope you celebrate the love in your life today!  Happy Valentine’s Day!


0

Fall In Love With This!

So you already know how much I adore ‘lovey dovey’ Valentine’s day projects, so here are two more simple decorative crafts for you to share with the love in your life!

Let’s start with the painted milk jars.  Such an easy and inexpensive way to create a personalized piece on your table!  When you see how easy it is, you’ll agree that you could get creative for any occasion, the possibilities are endless.

I started by tracing the heart shape onto the contact paper and then I cut it out and adhered  it to the center of the jar.

I used my trusty Frog Tape to create a band around the glass.

The project is prepped to begin painting…

I picked up some Acrylic Paint in Engine Red. This stuff is made for glass and ceramics (seriously, it says ceramics, clearly someone at paint headquarters loved the early 80’s) but for reals it’s pretty awesome!  I used my paint dabber (I only use technical terms here) and dabbed two coats around the whole jar.

After I finished the second coat I removed the frog tape and the contact paper heart.  You can see the one in the back…the heart has not been removed…and that’s the tricky part.  You want to remove it before the paint dries so you don’t peel dried paint off with it!  So the trick I used was a little push pin to lift off a corner then I pulled it off.  It’s that simple!

Now onto the platter…

While shopping at Home Goods (love that place) I found one of those vinyl wall saying that was perfect for this party and only $9!  It took me a while to figure out exactly what to do with it, but this $8 platter from The Christmas Tree Shop was the perfect solution.

I cut the saying to fit on the platter with the proper spacing then I followed the application instructions.  After the quote was adhered to the platter I hopped into my  time machine and used the acrylic paint for my “ceramics” and painted three little hearts to finish off the piece.

So what are you doin’ for your little love bugs this year?

0

A Little Love Song

It’s party time again!  Time to share an event I’m working on that I just LOVE!  I heart Valentine’s Day, and for this post I’m going to show you a super easy craft idea I used to decorate a mantel.

I’m always thinking about the budget when I’m decorating for an event, so of course I head to the dollar store to start my shopping!  For this project I picked up some wooden letters, a canvas, and some spray paint.

I laid the letters on the canvas and went wild with the spray paint!  (OK…not really wild…but rather three light coats)

And then it looked like THIS!  Once the paint is dry you can pick up the letters.  Great thing is, this craft is like two in one, as I used the pink “LOVE” letters to decorate a different area of the room.

So, maybe there was some truth to going “wild” with the spray…cauz you can see how some of the letters look a little fuzzy.  Well, if your wooden letters have staples in the back, take them OUT before you spray paint, or your end up with teeny bits of paint under certain areas of your letter.  (Clearly, there was no staple on the back on the V)  But I’m crafty, I can fix it, so I came up with another plan that I loved even more than the first.  I decided to call this piece “Love Song” and Modge Podged my way out.  Happy accidents are my favorite!

I popped open the piano bench and dusted off some of my favorite tunes.  (See Mom…I can still read music!)  Don’t worry, I didn’t wreck the book, I made photo copies.

I traced and cut out the letters, well most of the letters, I thought it looked pretty to leave my perfectly painted one white!  I worked some decoupage magic and it was done.  So simple and so pretty!

I hope cupid finds his way to your home this year!

0